Scroll views are something really helpful on small screen interfaces, or large content views, it allows to add more content to fit on the screen! but I don't know why, implement a scroll view with Auto Layout is not as intuitive as should be. In my moment I were checking about how to implement it with auto layout enabled and what was my surprise when almost all posted solution were suggesting to disabled auto layout for the view or add some code lines.... bad idea!
Today I would like to bring some light to the question "How to implement a scroll view with auto layout on iOS?", so here we go.
Create a new project
Create a new Single View Application project "ScrollViewSample". I will assume all of you already know how to do that.
Find in the "Project Navigator" the file Main.storyboard and open/select it. Now you will have in the center view the storyboard editor with an empty view.
We are ready to start with the really important part of the tutorial.
Adding the ScrollView
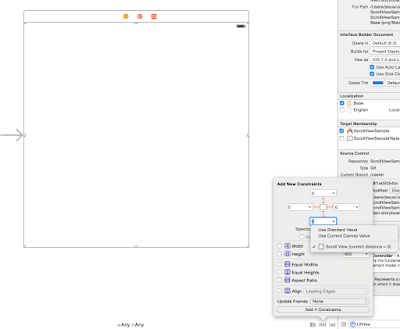
Let's start adding the main stone of the tutorial, an UIScrollView, inside the view of the current UIViewController. We need to make the scroll view use all the parent view space, in order to do that let's play with the constraints.
- Select the ScrollView
- Add new constraints.
- Un-check "Constraints to margins" (if available)
- Set 0 for space to Top (Top should be "View")
- Set 0 for space to Left (Left should be "View")
- Set 0 for space to Right (Right should be "View")
- Set 0 for space to Bottom (Bottom should be "Bottom Layout Guide")
Now the scroll view is fitting all the parent view.
Adding the content view
The next thing is to add inside the previous scroll view a new UIView, in that new view you will place all your UI elements.
Let's set the constraints for the new view. This time constrains will go agains the UIScrollView we added above, it will be the parent element of this view.
- Select the View
- Add new constraints.
- Un-check "Constraints to margins" (if available)
- Set 0 for space to Top (Top should be "ScrollView")
- Set 0 for space to Left (Left should be "ScrollView")
- Set 0 for space to Right (Right should be "ScrollView")
- Set 0 for space to Bottom (Bottom should be "ScrollView")
Finally we need to set the width size for the content view added, we are going to set it as the same as the scroll view. To do that we are going to use a really simple action, I think too many people don't know about it.
On the left column, where all views and UI elements of the storyboards appears:
- Drag and hold, with right button, from the content view to the scroll view.
- After release you will be prompted with few options.
- Select "Equal Widths".
Add two labels, one of them in the top and other at the end of the content view, you can make the view longer to make a better test.
Done!
Now we are finished. You can make the view inside the scroll view as big as you want and you will be able to navigate around all inside.
I hope it will be useful, if you have any question I will try to help you :)


No comments:
Post a Comment